Bench / Repair notes / Repair Note: A Split Tabletop and the Butterfly Key That Holds It
Repair Note: A Split Tabletop and the Butterfly Key That Holds It
Gluing a split in a solid tabletop back together without acknowledging why it split is a repair with a known expiry date. A butterfly key, cut across the grain, is the traditional answer and it is the right one more often than the modern alternatives.
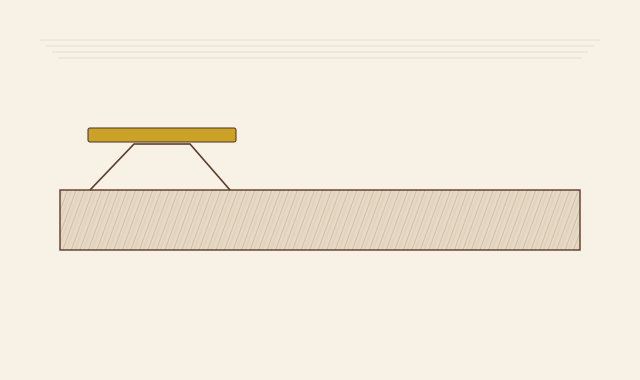
Why the split happened, because that decides the repair
A solid top splits because it was restrained. Wood moves across its width with every humidity change, and a top that has been fastened to a base with a screw at each end and no slotted holes has nowhere to go. It splits along the grain, usually near the middle, and usually at the point where the fastening is tightest.
This top had six screws along each apron, all in round holes. Over forty years of seasons the top tried to move about 4 mm across its width twice a year and could not. The split was 180 mm long, running from the front edge, and the two sides were 1.2 mm out of level.
Bench note: If you glue this split closed and put the top back on the same base with the same round holes, it will split again, in the same place or next to it. Fix the movement problem first; the glue is the easy part.
Why a butterfly key and not a screw or a metal plate
The instinct on a working table is to run a screw or two across the split from underneath. Screws into end grain hold badly, and a screw head under a top that gets scrubbed and moved is a head that eventually telegraphs through the surface.
A metal plate is worse on a solid top, because the plate does not move with the wood at all and now you have two rigid fixings fighting each other instead of one.
A butterfly key is a piece of wood let into a pocket cut across the split, shaped like a bow tie so that its two wide ends are in sound timber on either side. It works because it is cross-grained: the key's grain runs across the split, so the key does not shrink along its length when the top shrinks across its width. The key holds the two sides at a fixed distance while allowing the whole assembly to move as one.
Fix the movement problem before you cut anything
New fastening for the top: six screws per apron, each through an elongated hole, with a washer under the head. The holes were drilled round and then slotted 8 mm in the direction of the top's cross-grain movement with a router or a round file.
That change alone removes the cause. Everything else is repairing the damage. Doing the repair without doing this is what makes a table come back in two years with the same split in a new place.
Close the split dry and see how well it fits
Bar clamps across the top, waxed paper between the caul and the surface, alternating pressure from each side so the top does not bow. Bring it closed slowly — a split that has been open for years will not close completely on the first attempt, and forcing it with a clamp will crack the top on the opposite side.
This one closed to a 0.1 mm line after 20 minutes of gentle pressure, released and re-tightened twice. That gap is acceptable; hide glue bridges it. If it had stayed above 0.3 mm, the right answer would have been to clean the split, glue it, and then key it anyway while accepting that the joint would remain visible.
Make a pattern for the key, and mark it out with a knife
Card stock, folded in half, cut to a bow-tie shape with a wide-to-narrow-to-wide profile. The proportions that work: the key about 70 mm along the split, 22 mm at its widest, 9 mm at the waist. Wider than that and you are removing more sound timber than you are gaining in strength.
Position the pattern so the key's length is centred on the split and both wide lobes sit in solid, un-split timber, at least 25 mm clear of any edge or fixing. Mark around it with a marking knife, not a pencil — the knife line is what your chisel registers against.
Rout or chop the pocket, and check the floor is flat
Routing with a template and a collar is faster and more accurate than chopping by hand, but only if the workpiece is genuinely immovable. Four clamps, and check the template cannot shift by pushing it hard in all four directions before the router goes anywhere near it.
Depth: the key should be about two thirds of the top's thickness. This top was 30 mm, so the pocket went to 20 mm. Go deeper and the top is left too thin to resist the next split; go shallower and the key does not have enough bearing.
Small router plane across the pocket floor afterwards to make sure it is flat. A pocket floor that slopes means a key that rocks, and a rocking key does nothing.
Make the key, fit it dry, then glue it
Key cut from walnut with the grain running across the pocket — that is the entire principle, and a key made with the grain along the pocket is worse than no key at all. Cut slightly oversize, then pared to a snug fit with a chisel, checking the fit dry.
The fit you want is one where the key can be pushed in by hand and needs a gentle tap to seat fully. A key that drops in is too loose. A key that needs a mallet is too tight and will split the pocket.
Hide glue on all mating surfaces, key in, clamp across the top (not across the key — the key does not need clamping down, it needs to be held while the glue sets), 12 hours.
Flush the key, and finish the whole top, not just the key
Plane the key down close to flush with a sharp plane working from the outside in so you do not tear the pine around it, then scrape and sand flush. The key end grain takes finish differently from the pine face grain, so a key finished on its own will always read as a patch. The whole top gets the same treatment, key included.
The walnut key stays dark against the pine and is meant to. It is a visible repair and hiding it would be the wrong ambition; a butterfly key is a piece of joinery, and a table that has been properly mended is a table with a history.
One tabletop, one split. A split that runs into a fixing, a knot or the edge of the top needs a different approach; have it assessed before cutting. Information only.